
Canon PIXMA G6010 Driver Download for Windows 11-10-8.1-7 32bit-64bit
G6000 series Full Driver & Software Package-G6000 series MP Drivers for Microsoft Windows
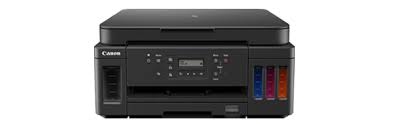
The Canon PIXMA G6010 Wireless All-in-One Printer is for those who want to print, copy and scan. It also boasts a high page yield of up to 8,300 pages of black text and up to 7,700 pages of vibrant color. It provides high page yields with sharp black text and vivid color images.
Canon PIXMA G6010 Driver for Windows
Compatibility Systems: Windows 11, Windows 10 (32bit), 10 (64bit), Windows 8.1 (32bit), 8.1 (64bit), Windows 8 (32bit), 8 (64bit), Windows 7 (32bit), 7 (64bit)
| Driver Name | Version | Release date | File Size | Operating systems | Download Link |
| G6000 series MP Driver | 1.01 | Oct 4, 2021 | 88.50 MB | Windows 11-10-10×64- 8.1-8.1×64-7-7×64 | Download |
| G6000 series Full Driver and Software Package | 1.4 | 13 Nov, 2024 | 19.82 MB | Windows 11-10-10×64- 8.1-8.1×64-7-7×64 | Download |
G6000 series Full Driver & Software Package: This file will download and install the drivers, application or manual you need to set up the full functionality of your product.
Download / Installation Procedures
* Be sure to connect your PC to the Internet while performing the following:
1. Download the file. For the location where the file is saved, check the computer settings.
2. Double-click the downloaded .exe file. It will be decompressed and the Setup screen will be displayed. Follow the instructions to install the software and perform the necessary settings.
G6000 series MP Drivers: This driver will provide full printing and scanning functionality for your product.
Download / Installation Procedures
- Download the file. For the location where the file is saved, check the computer settings.
- Double-click the downloaded EXE file to decompress it, then installation will start automatically.
Uninstall Procedures
If needed, you can uninstall this program using the Control Panel.
Note :
The steps below are for Windows 7. This procedure may be different for other OSes.
- On the Start menu, click Control Panel, and then, under Programs click Uninstall a Program
- A page will open with a list of installed programs. Double click on the program that you want to uninstall.
- Click “Yes” then “OK”, this will complete the uninstallation process.